Achieve more when you manage your tasks alongside your calendar
Traditionally, task management was the domain of to-do lists, task manager apps, and project planning tools. While these tools can be powerful ways of assigning and planning the tasks that need to be done, they tend to fall short when it comes to allocating time to execute those deliverables. To-do lists on their own are full of good intentions, but hard to prioritize and execute when they live in isolation.
Morgen brings your calendar and tasks together into one shared experience, allowing you to easily see your most important tasks and find time to tackle them. You can even filter by the Morgen Priority Factor to see what is most deserving of your attention at a given time and use the AI Planner to schedule tasks in your calendar.
In this guide, we’ll share top tips for how to get the most from managing your tasks in Morgen.
How to set up Morgen task lists
Unlimited Morgen tasks are available as part of every Morgen account.
To see your Morgen Tasks, click on the checkbox icon in the left rail or use the Alt+A shortcut.
To create a task list:
- Click on View to open the task menu
- Select + New task list
.png)
- Type the name of your list in the open field that just appeared then click Enter
- You can then assign a color to the task list by clicking … next to the list
.png)
You can always reorder your tasks lists.
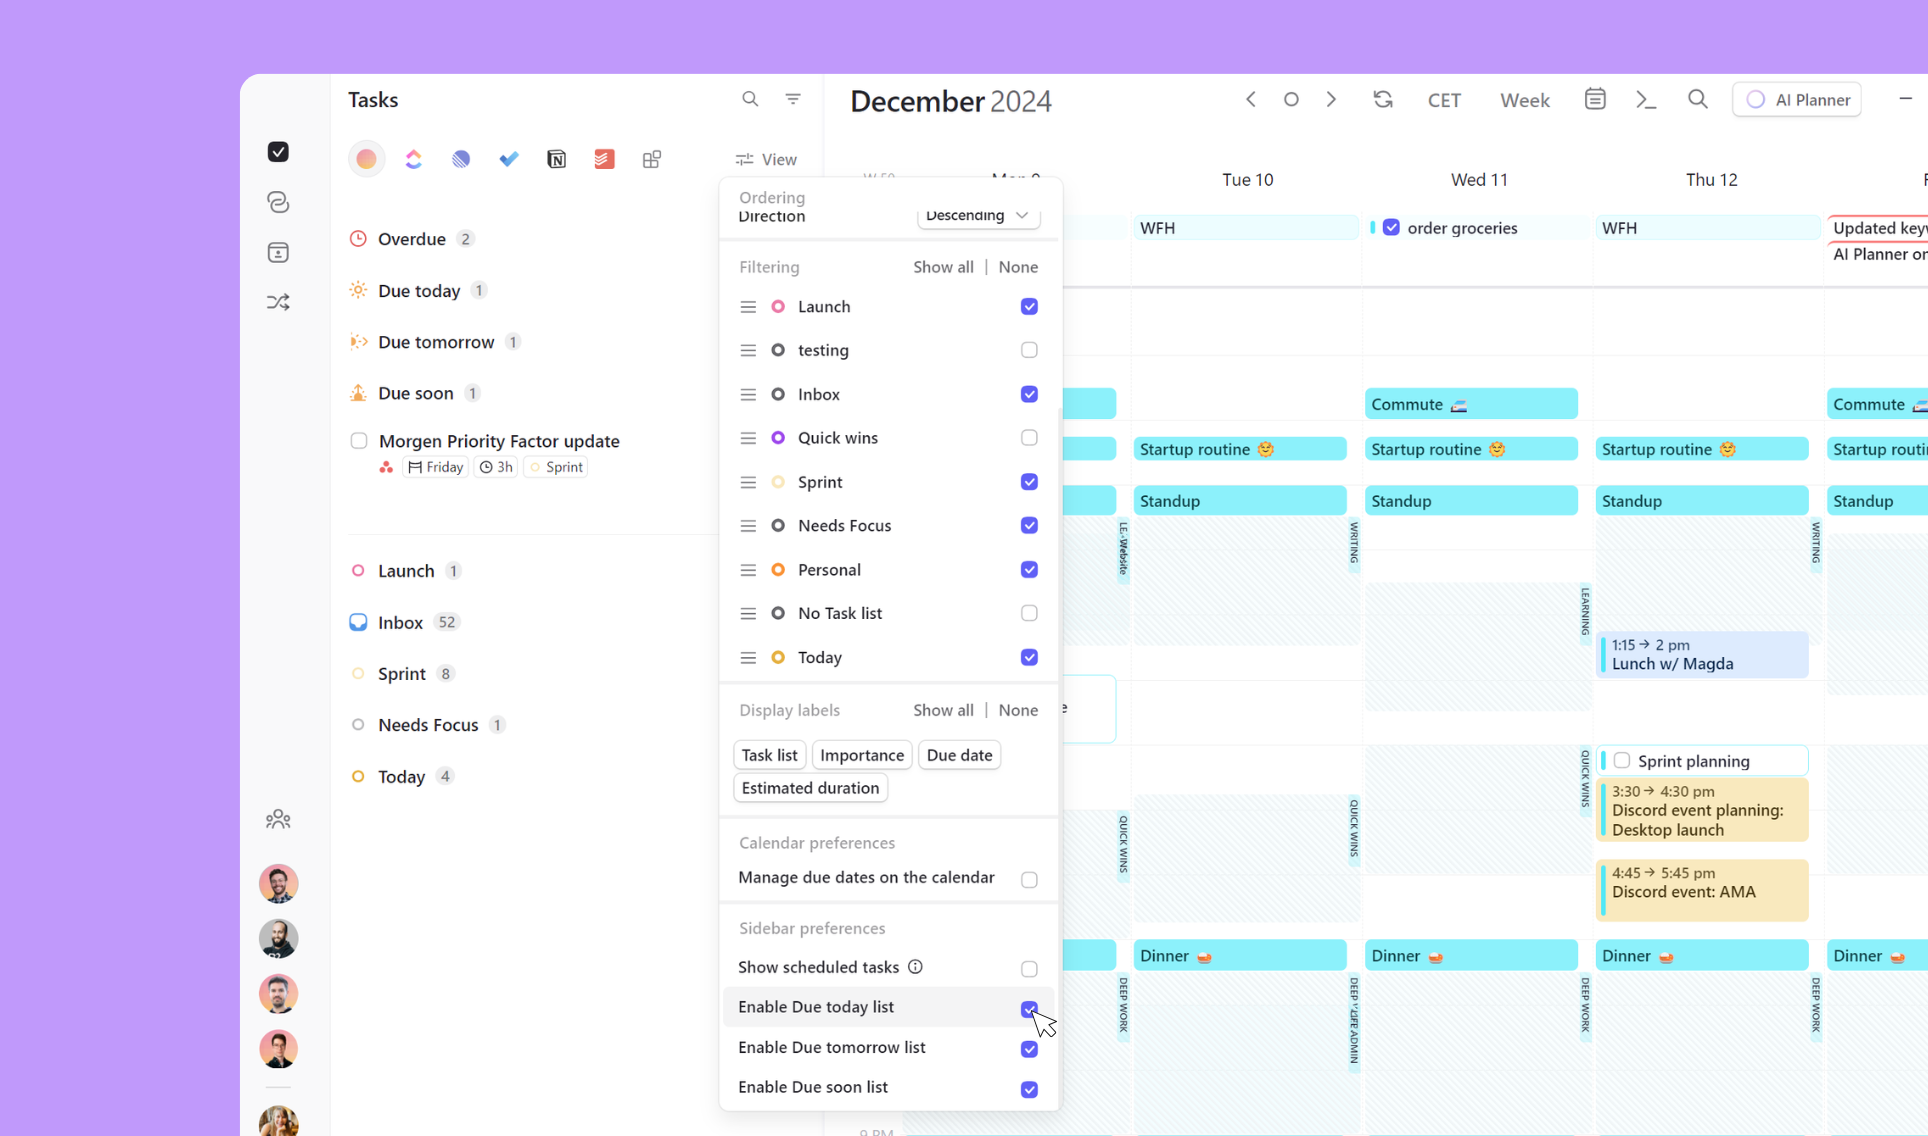
- Click on View to open the task manager menu
- Under Filtering, you will see all of your lists. Click on the three lines to the left of the list name, then drag it to a different place in the list
Immediately, you will see the lists reorder in your task panel.
.png)
There are also 4 additional task lists that appear at the top of the task panel to make it easier to identify time sensitive tasks:
- Overdue
- Due today
- Due tomorrow
- Due soon (due in the next 7 days)
The Overdue list will always be displayed. You can choose whether to display the other 3 lists. If you display all 3, note due soon will capture tasks due within the next 3-7 days so as not to duplicate tasks in the due today and tomorrow lists.

Creating a Morgen task
You can now add tasks to your lists.
Tasks can be created in 3 ways:
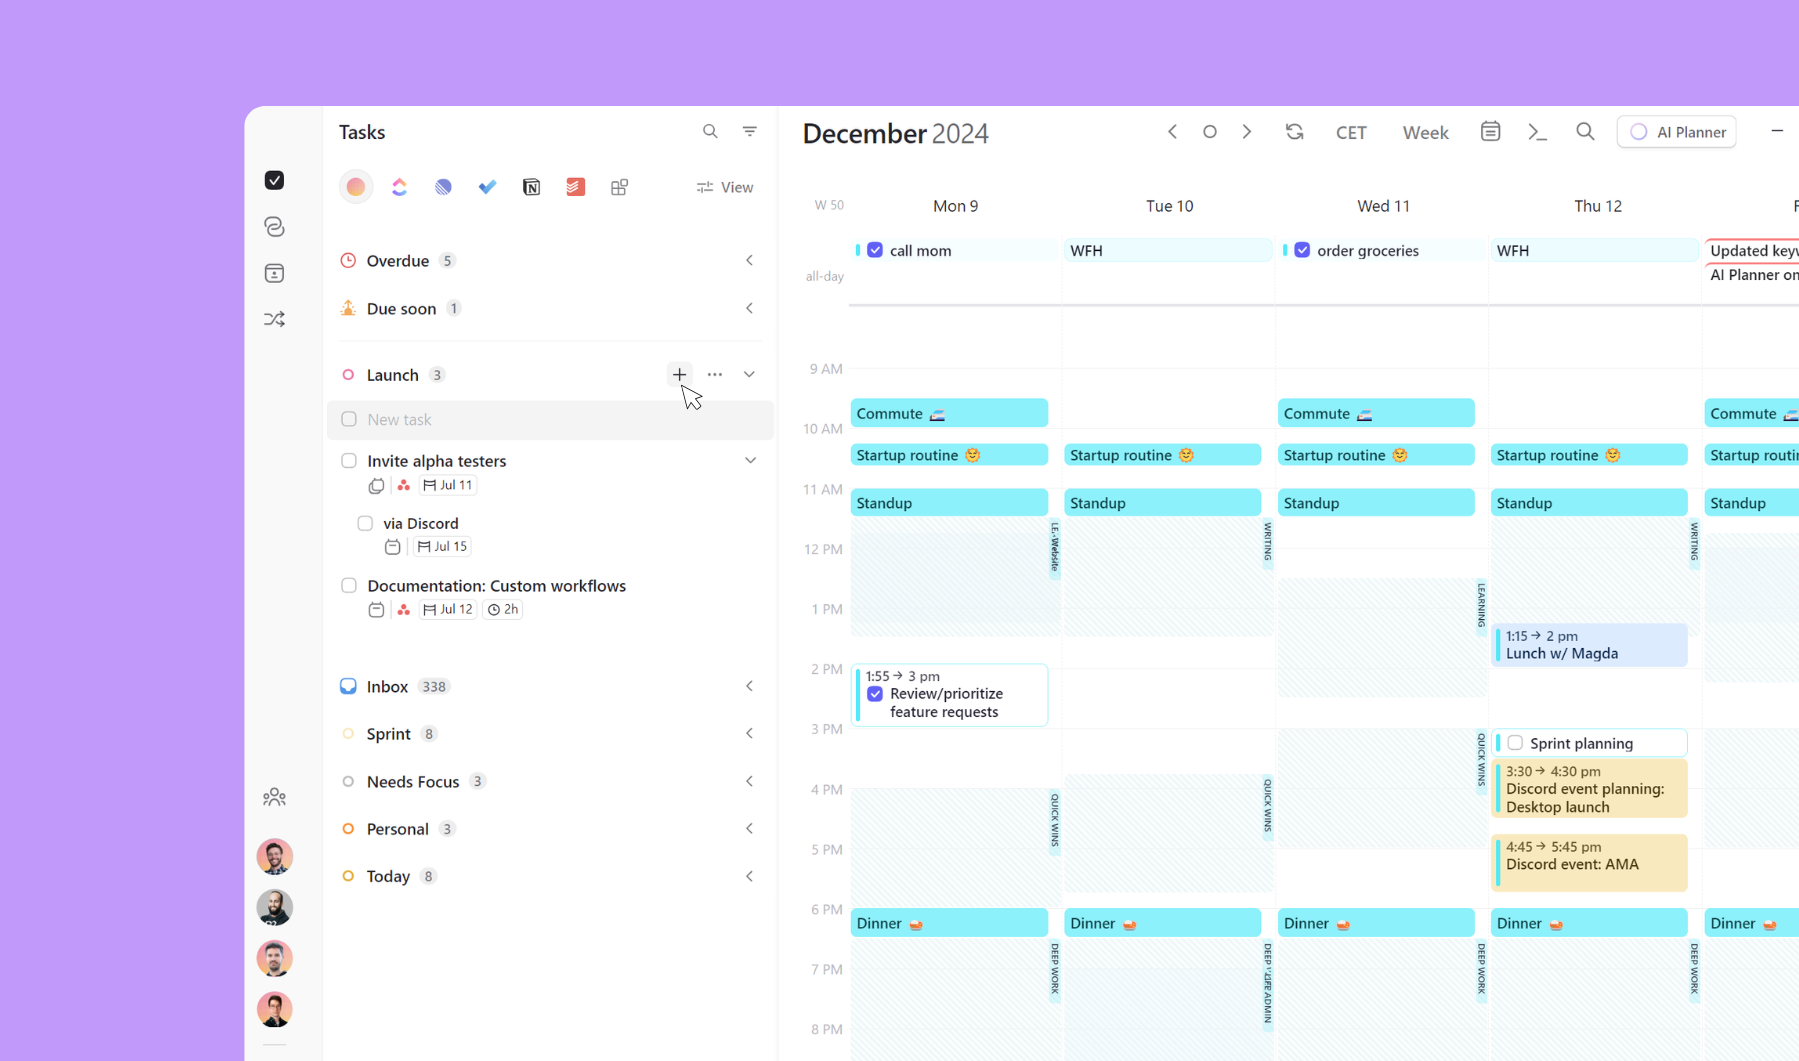
- From the task panel, hover over a list name to make + appear to the right of the task list name. Click on the + and a new task field will open below.

- From the calendar, create a scheduled task. Highlight an area in your calendar. By default this will open an event. You can change this to a task by selecting Task (rather than Event) in the upper right corner of the widget or by typing task followed by space in the task name (then simply continue typing to add the task name). You can then add additional details about the task, including any notes, the associated task list, importance, and due date. You can also set up a recurrence pattern.

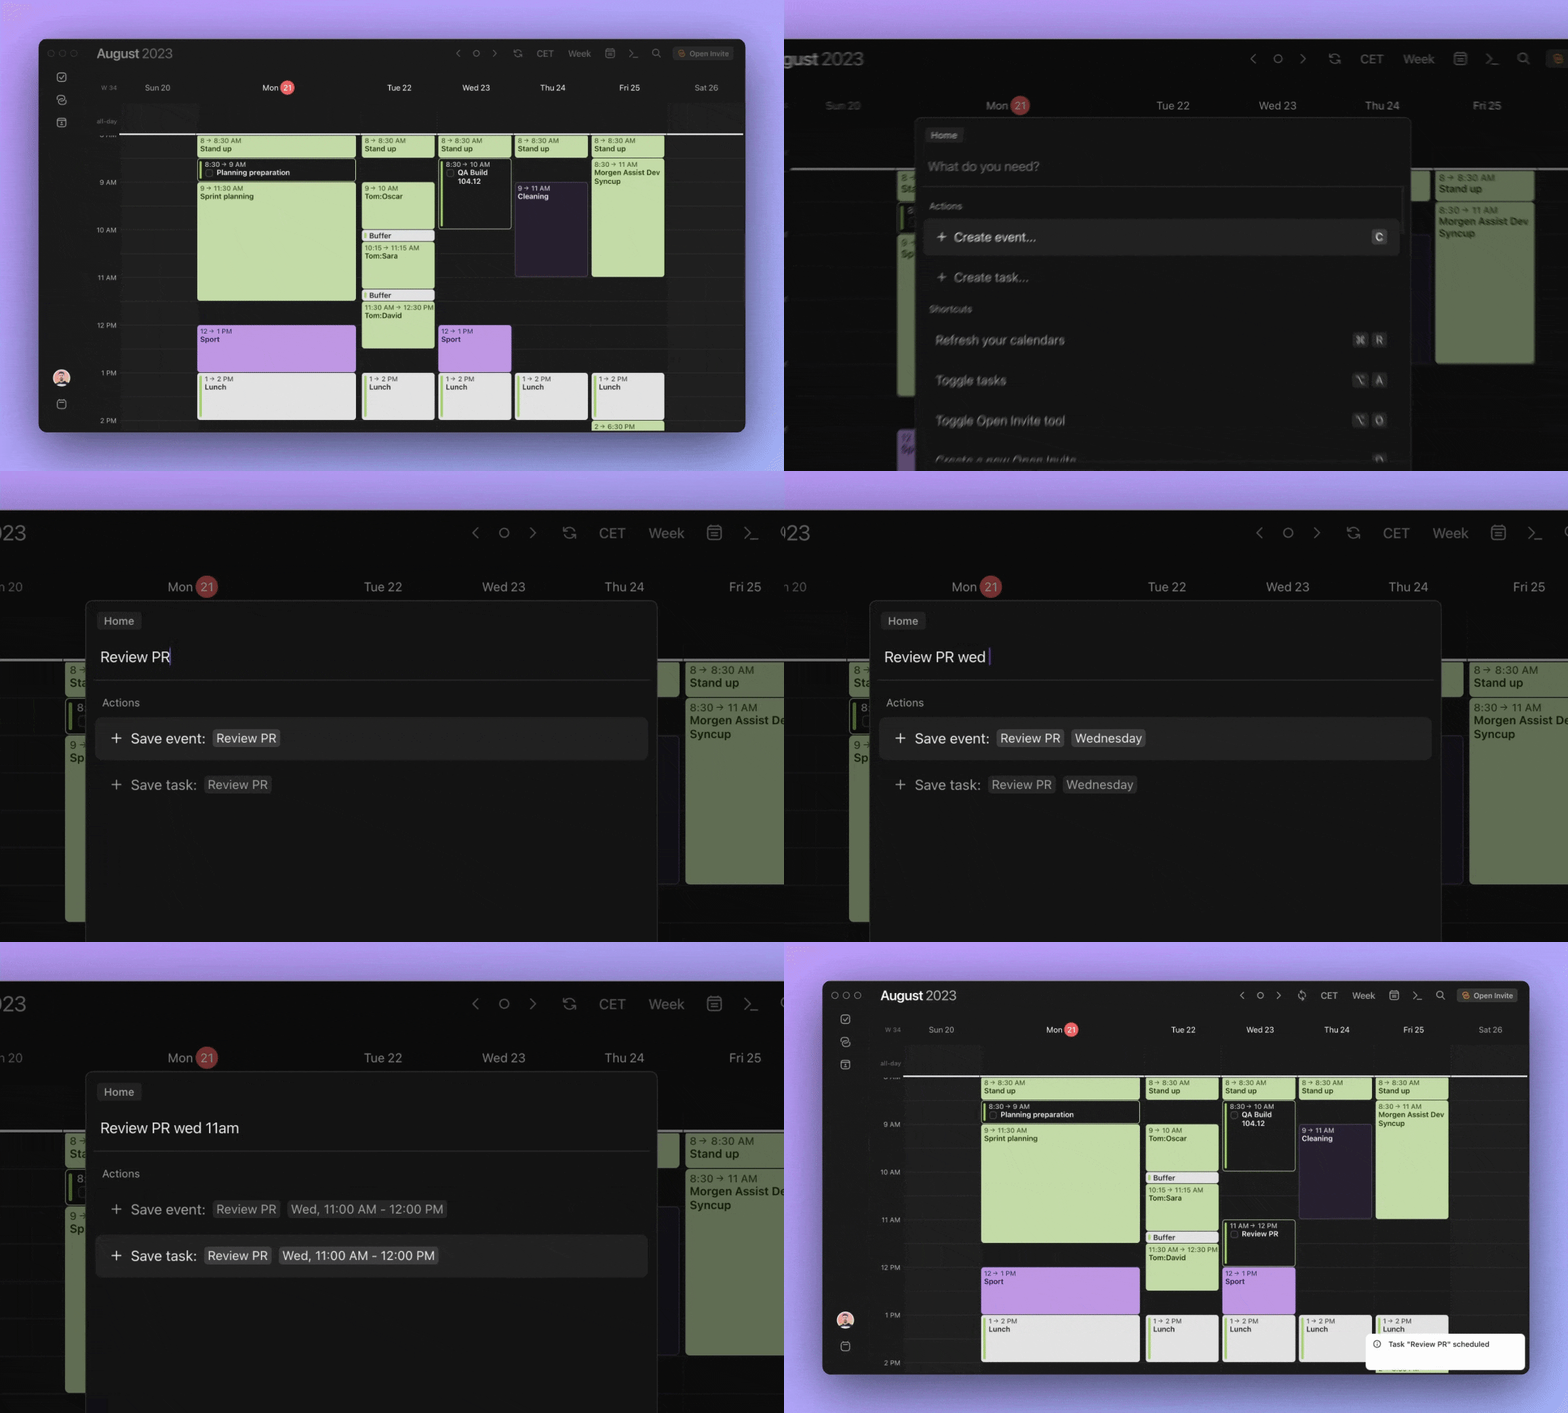
- From the command bar, quickly create a task using natural language. Open the command bar with CTRL+K or from >_ in the top navigation. Here you can create a task, assign it to a list and add a due date.

You can also add subtasks in Morgen. To do so, from your open task list, simply click + next to a task. This will open a blank subtask.
You can also add tasks from other to-do apps and task managers, including Notion, Linear, Todoist, Obsidian, ClickUp and more. Here's the full list of integrations.
For more tips on managing your tasks in Morgen, here's a quick how-to video packed with great tips:
.png)
.png)
.png)

.png)