Teams who use Morgen can easily check one another's availability, making it easy to book meetings that work for everyone. What's more, everyone's availability will be based on their selected 'Busy Calendars' making it an accurate reflection of their complete schedule.
If your team uses Google or Outlook calendars, and has permission in those underlying calendars, you can also see colleagues' availability even if they don't use Morgen. The experience isn't as integrated as Morgen Team availability check as described below, but will still provide you with their base availability as indicated in their work calendar. Learn more in this guide.
Before you can see your colleagues' availability, you will need to be set up as a team on Morgen. If you haven't already, you can invite your team members to join you on Morgen from your Team + Billing page in the Morgen platform. Once your team has accepted their invites, you can proceed with the next steps.
Set up Morgen for quick availability check
In the bottom left of your Morgen desktop app, you will see a team icon. When you click on it, your team tab will open in the left sidebar. Here you will see your team members listed.
You can now choose the team members who you meet with most, then pin them to your left navigation bar. Simply hover over the team member listed and click on the pin. You'll see that team member's avatar (or, if they don't have a photo connected to Morgen with Gravatar, their initials) now on your left nav. You can pin up to five team members for quick availability check.
You can then close your team tab by either clicking on the team icon again or simply hitting the space bar.
See when your colleagues are free/busy
To see when your colleagues are available, simply click on their profile picture from your left nav. You can select one person or multiple people.
You can also check the availability of team members who are not pinned to your left nav. To do so, open your team tab from the team icon, then click the team member from the overall team list.)
In doing so, you will see your colleagues' calendars overlaid with your own, making it easy to find open spaces for meetings.
.png)
Some quick tips:
- You won't see the details of your colleagues' calendars, nor will they see yours. All that is visible is whether you are busy/free.
- Availability is based on each person's 'busy calendars', based on their settings in Morgen. This means you and your colleagues can choose to include your personal and subscription calendars in your availability to avoid conflicts with external and personal commitments.
- Your colleagues' calendars will be displayed in the same colour as the border that appears around their avatar when you select it. This means that if you're trying to check availability for a group, you can easily distinguish which events belong to whom, making it easier to prioritize those people's calendars who are required in the meeting (vs optional attendees).
Create a meeting at an ideal time
Once you have found the time for your meeting, highlight that space in the calendar. This will open a new event to which you can invite your team members to and send, just like any other invite.
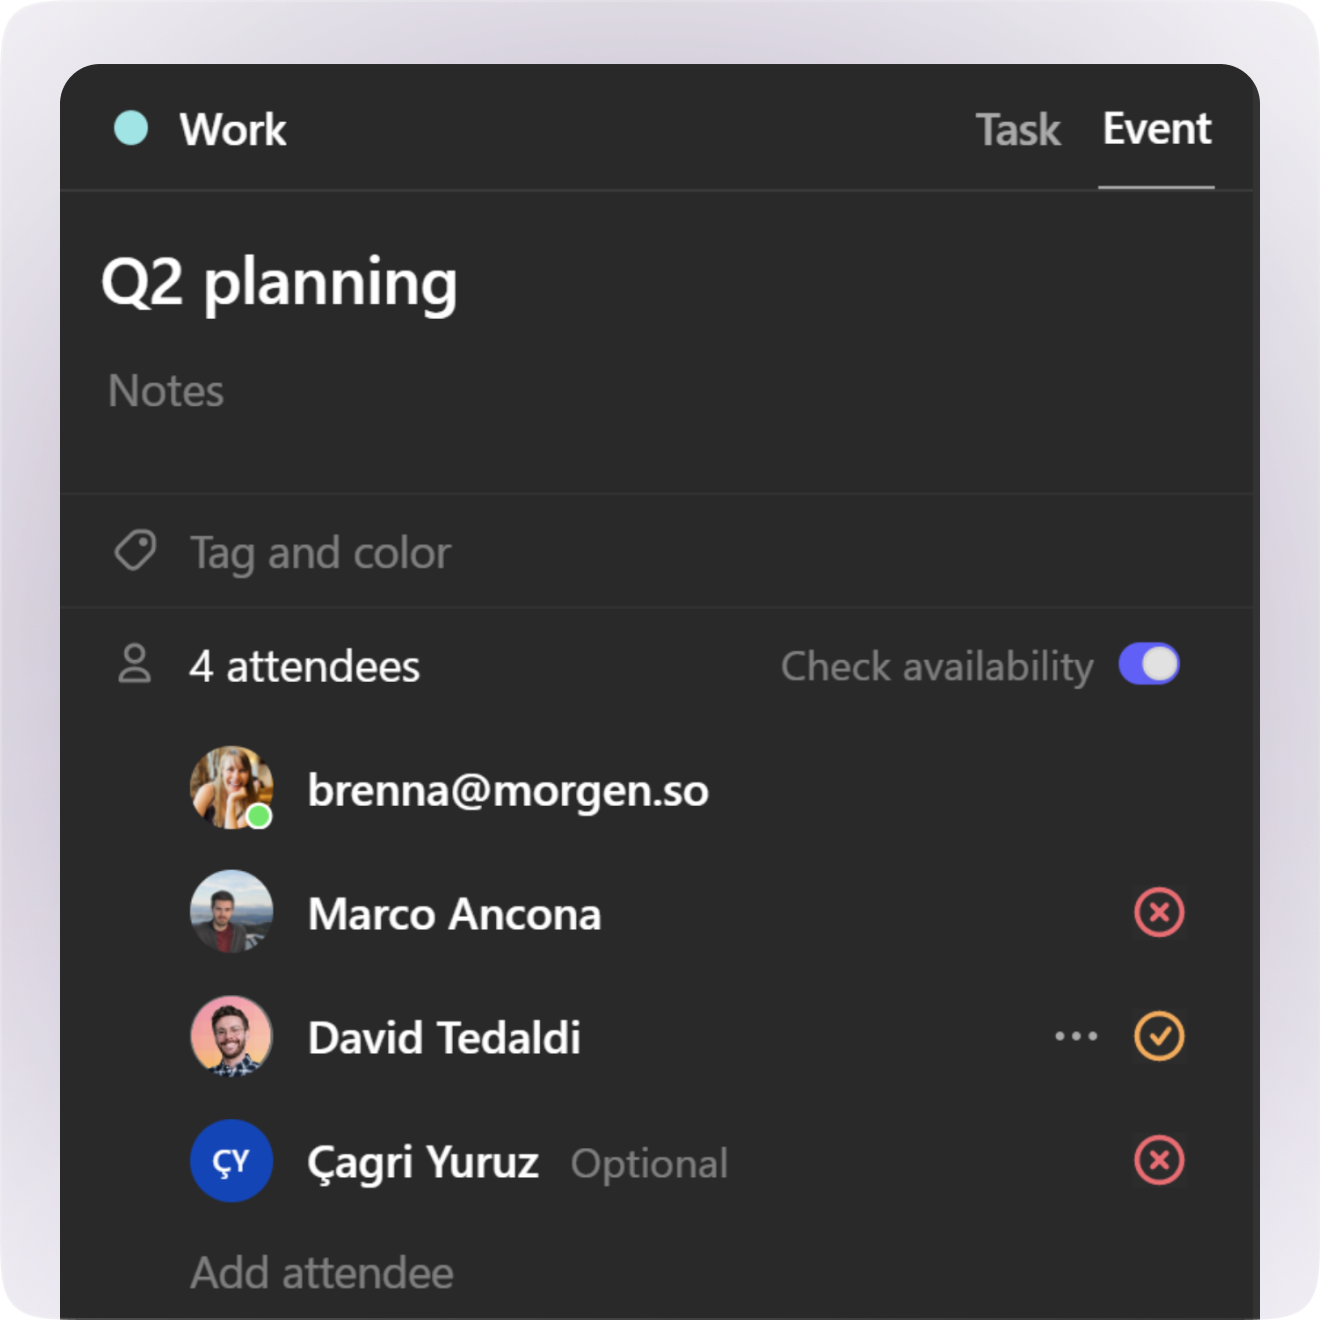
Once you add your colleagues to the invite, you will notice an icon next to each of their names. These are meant to help you pick optimal times that don't overly fragment people's time.
- Green check mark: This is a great time to meet! This person is available AND the meeting won't break up a block of focus time into smaller, unproductive periods of time.
- Orange check mark: Possible, but non-optimal. This person is available, but the meeting disrupts their focus time in a way that creates distinct short blocks of time that are hard for deep work. If possible, we recommend finding another time, especially if this person is a required attendee.
- Red X: This is person is not available. If they are an optional attendee you can decide whether to proceed anyway.

If you see red Xs and orange check marks, we recommend trying to find an alternate spot if possible.
.png)
.png)


