What is a Morgen Booking Page?
Morgen Booking Pages are your unique and customized scheduling page that you can share with others so they can easily book time with you. It’s a great way to make others feel that you’re accessible, to define the types of meetings to book with you, while also ensuring the time fits with your schedule.
Not only can you customize your page, you decide how and where to share it with others.
With a Morgen Pro subscription you will have access to a customizable Booking Page, including our white labeling features and unlimited Scheduling Links.
How to customize your Booking Page
Your Booking Page should feel like an extension of your communications. Add a personal message, photo, and custom url to personalize your page.
In the Morgen desktop app, customize your Booking Page:
- Click on the Booking Page icon from the left sidebar.
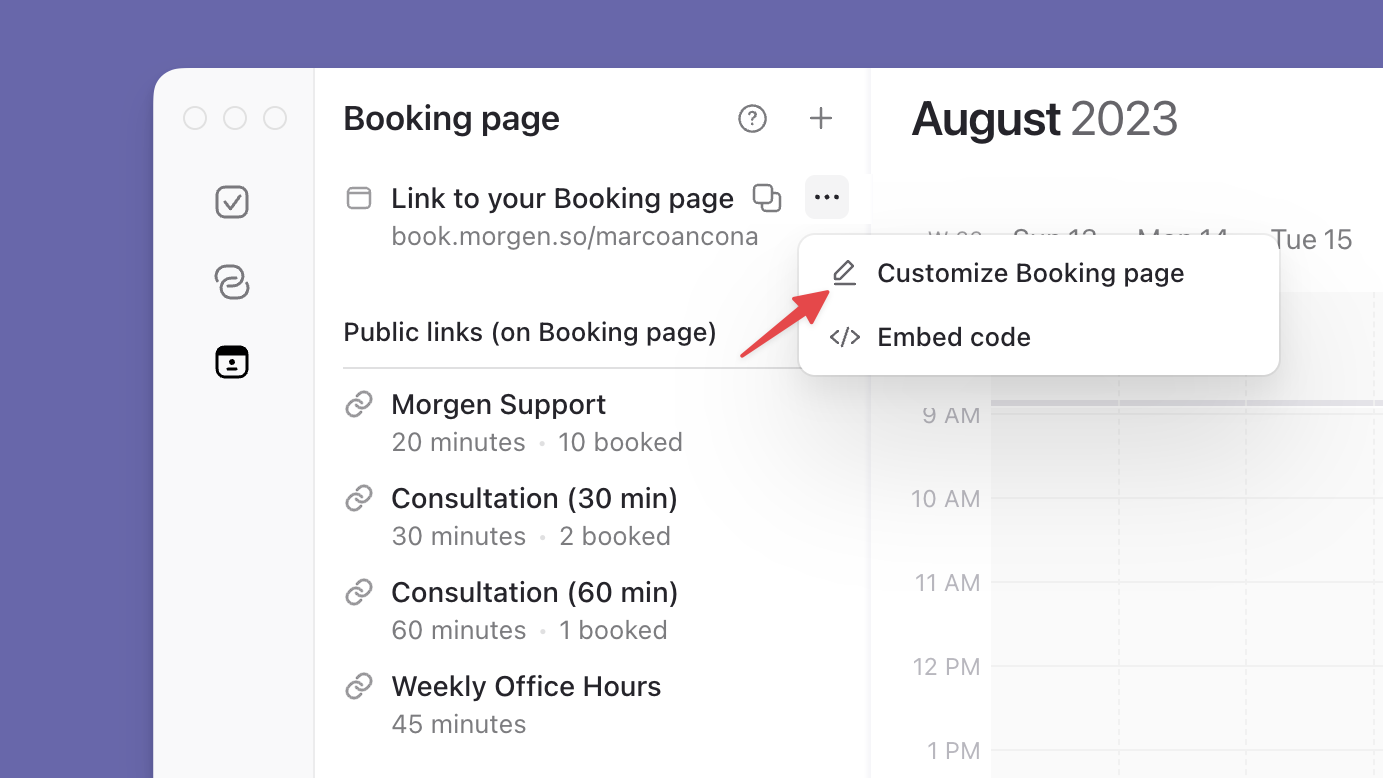
- Next to your Booking Page url, click on … to open the menu. Select Customize Booking Page.

- From here, you can add a title and welcome message, as well as change the url from the default provided. (Note, that if you change the default after sharing your Booking Page, you will need to update those links.)
- You can also add your logo, select a custom brand color, and opt to turn off the Morgen branding.
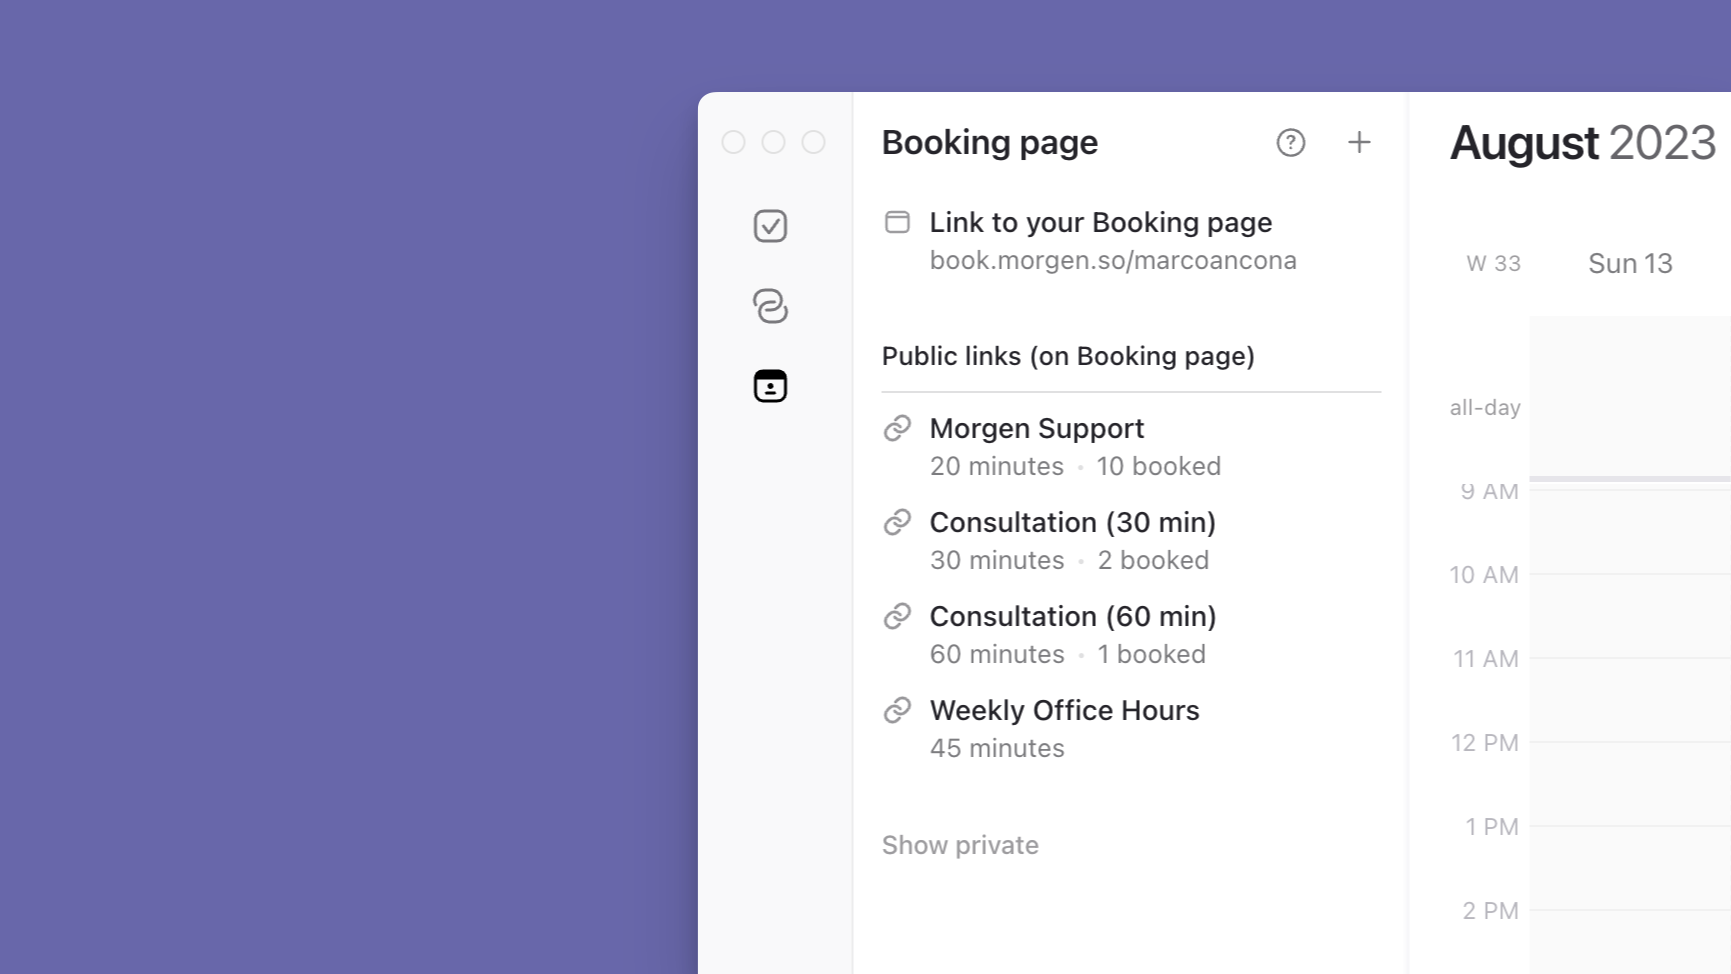
After customizing your page, check how it looks by clicking on your Booking Page link (always listed at the top of the Booking Page tab). This is what others will see when they arrive at your page.
How to add meetings to your booking page

Your Booking Page will display different meetings that others can select and then book with you. Each of those meetings is created using Morgen Scheduling Links. You can also include Open Invites, though because those are time bound, we they are by default not included on your Booking Page.
From your Booking Page tab in the Morgen desktop app you can create Scheduling Links by clicking on the + next to Scheduling Links – Public. By default, each of these links will appear on your Booking Page unless you set them to private.
Step-by-step instructions on creating Scheduling Links are available in this guide.
We recommend only including Scheduling Links that are intended to be booked multiple times and by multiple people on your Booking Page, and to keep these somewhat general so that you don’t have a long list of meetings.
For example, first-round job interviews, coffee chats, introductory calls are all great fits.
Sharing your booking page
Your Booking Page url is not indexed. People will only find it when you share it. Best practices for sharing your Booking Page including linking to it from your email signature, including it in your LinkedIn profile, pinning it to the top of your Twitter feed.
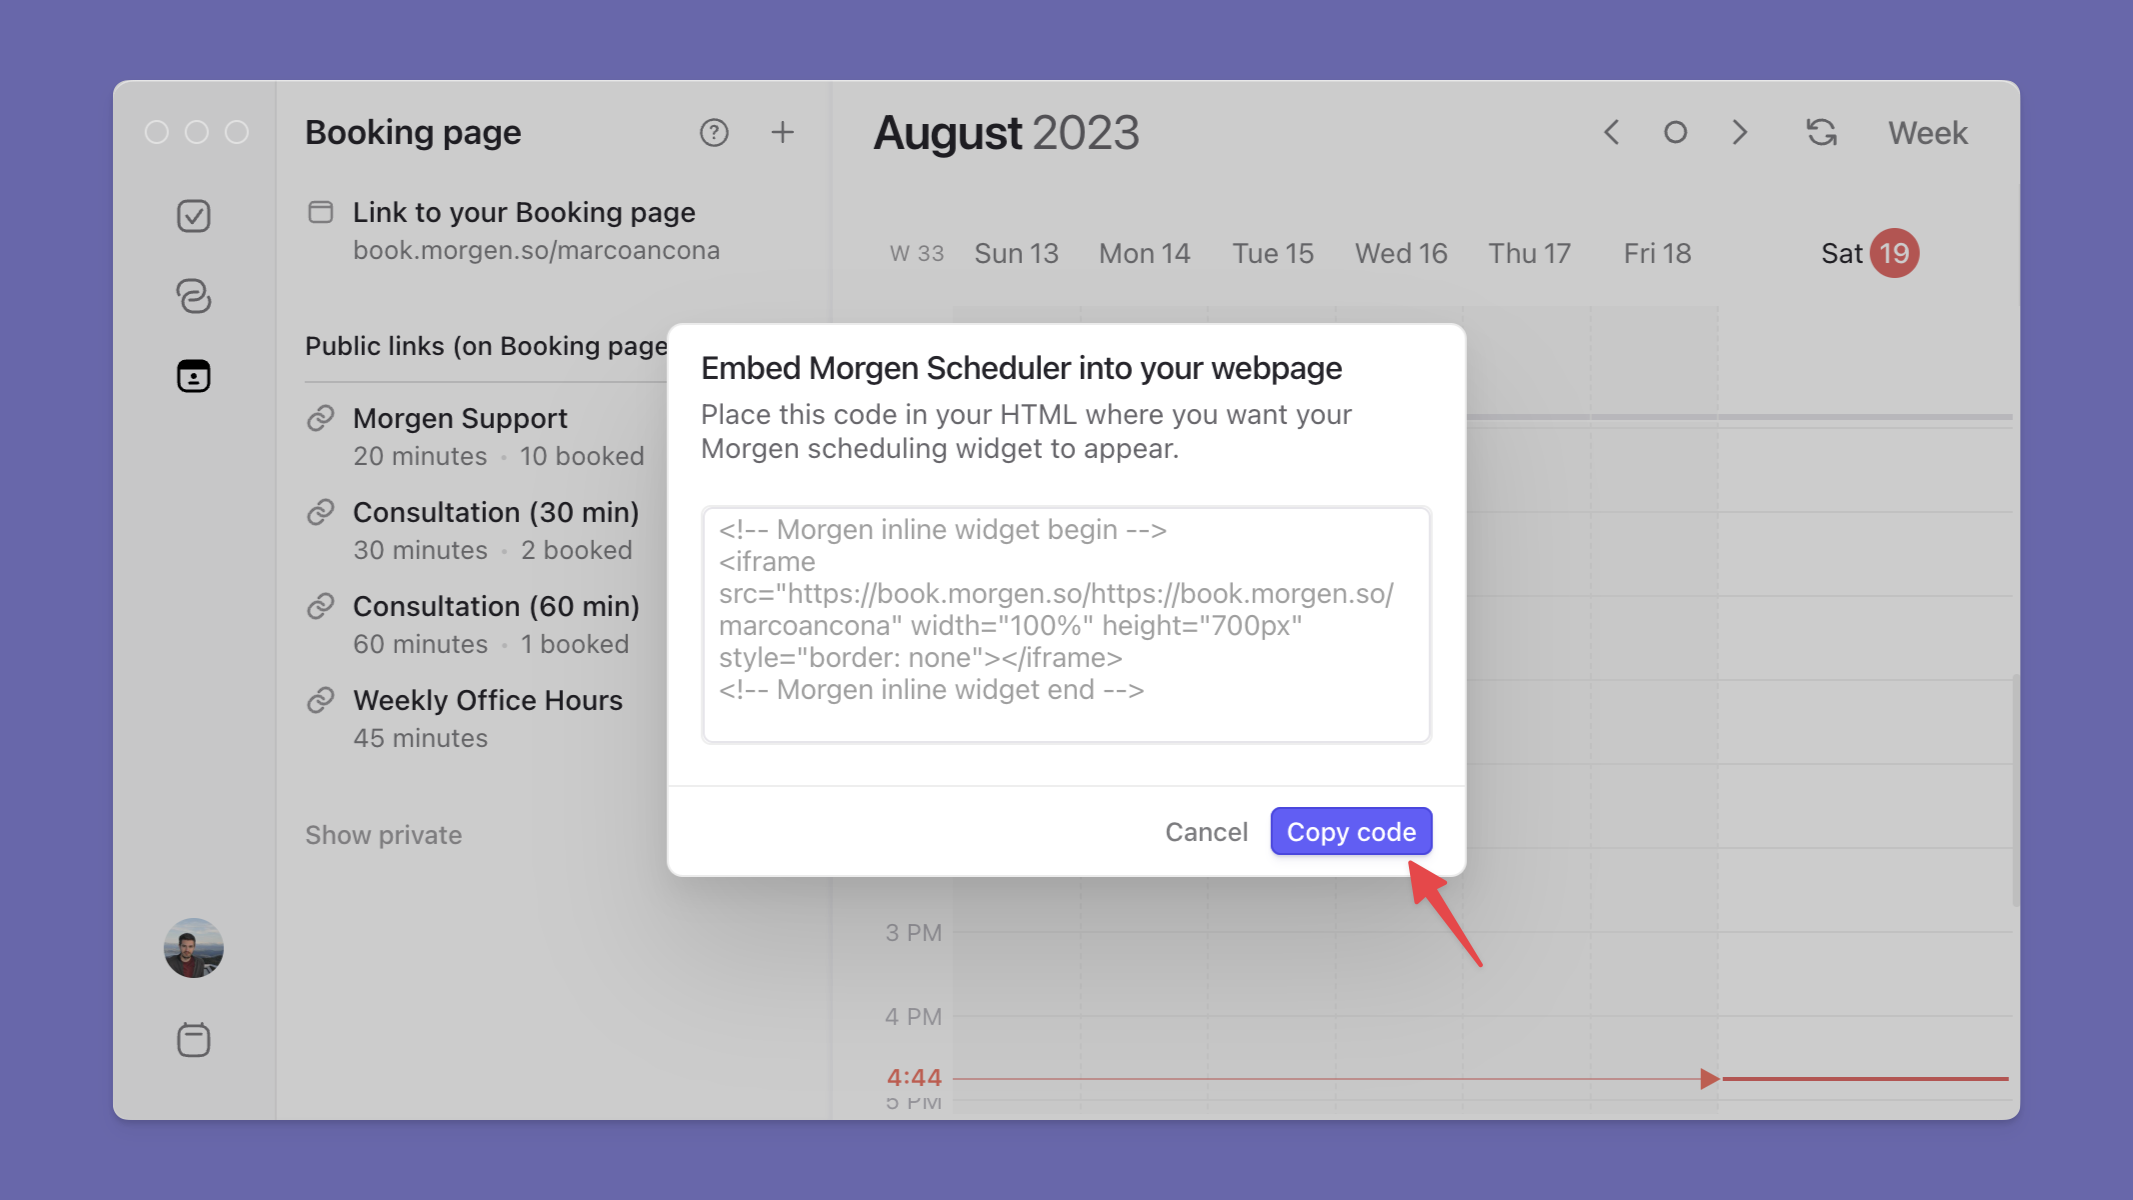
You can also embed your Booking Page in your website so that people can book time with you without leaving your site. Access the embed code by clicking on the … next to your Booking Page. Simply add the code to your website and add the Morgen widget.

How will you be notified of meetings booked
You will always be notified of meetings scheduled through your Booking Page in 3 ways:
- You, any co-hosts, and the attendee will receive an email notification from Morgen confirming the details of the meeting, including any notes they added when booking the meeting.
- The event will appear in your calendars.
- You will receive notifications from Morgen at the intervals you selected when setting up the corresponding Scheduling Link (ex. 15 min before the meeting).
If the attendee cancels the meeting, you will receive a cancellation email and the event will be removed from your calendar.
If the attendee reschedules the meeting using the Scheduling Link (within the meeting details this will be linked), you will be notified by email.
FAQs about Morgen’s Booking Page
How does Morgen offer only times that I am available through my Booking Page?
When you set up Morgen Scheduling Links, you will be selecting time blocks that generally fit your schedule and the type of meeting. That said, Morgen will only show invitees times that you are actually available based on the calendars you define as your ‘Busy Calendars’. Under the Availability Tab of your Profile, you can select which of your connected calendar accounts should be considered when ascertaining your availability.
In this way, your available time slots will be determined in real-time. Additionally, as soon as someone books a meeting through your Scheduling Link, that time will no longer be available to others.
By default, all Scheduling Links will take these Busy Calendars into account, unless you indicate that they should not be used for a particular scheduling link.
Can I manage and share my Booking Page from Morgen’s mobile app?
You can update and manage your Booking Page from Morgen’s desktop app. You can however share it from mobile. Simply select the link tab from the bottom navigation on Morgen’s mobile app.
There you will see a list of all your Scheduling Links and your Booking Page. Tap on them to copy the corresponding link and paste the url into an email, Slack, or SMS/Whatsapp/Signal/Telegram, etc. to an invitee.
How do I exclude certain Scheduling Links from my Booking Page?
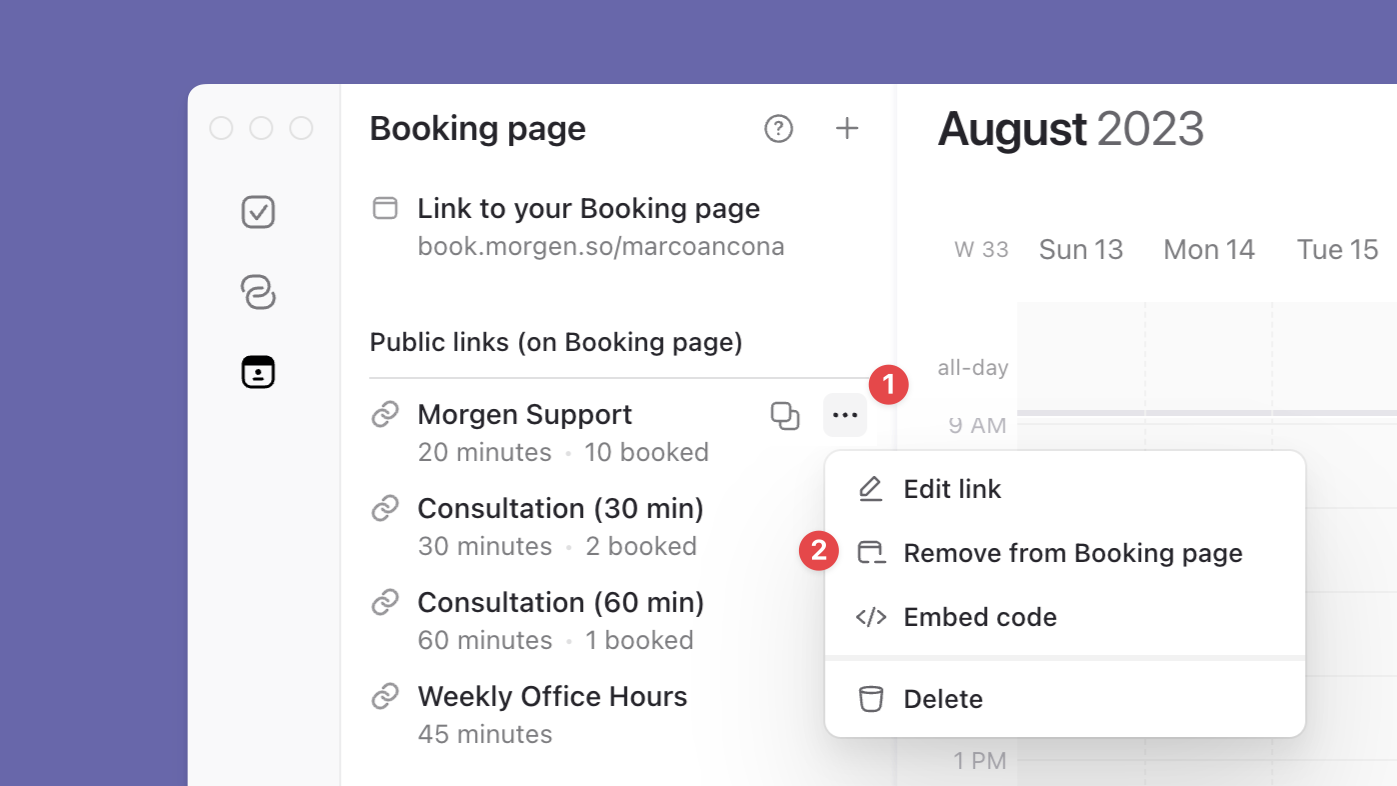
By default, all Scheduling Links appear on your Booking Page. You can exclude certain links manually from the Booking Page tab of your Morgen desktop app. Simply click on the … next to the link to change it from Public to Private.

Can I use my Booking Page for a one-time meeting?
If you want to create an invite to a specific one-time meeting and offer your invitee options to pick from when it comes to timing, we recommend using Morgen’s Open Invites. These can be included on your Booking Page, though by default are not. Once an Open Invite expires (there are no available sessions in the future), it will automatically be removed from your Booking Page.
Can I use my Booking Page to schedule meetings with multiple attendees?
Multi-person scheduling links are available for teams who use Morgen together. Learn more about how they work in this guide and invite your team to try them out.
For more tips on managing your Booking Page, here's a quick video tutorial:
.png)
.png)

.png)
.png)